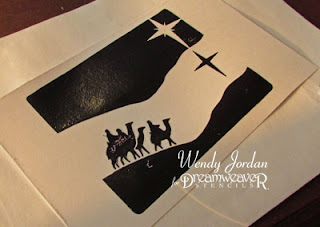
Good morning!! Welcome to Dreamweaver Stencils Christmas in August Challenge. The month is coming to close and just another week to enter your creation on the Dreamweaver Stencils Blog, Dream It Up.
For my set of cards I chose a technique that I saw at Winter CHA 2011, using stencils with a cool product Stampee Foils. There are a few ways you can create this technique, but because I am a "lazy" crafter, I chose too use as many Dreamweaver products as possible. This translates into using Dreamweaver Stencils is EASY!!!
With stencil Wise Men, LL306, I "power pasted" four card panels with Glossy Black Embossing Paste by Dreamweaver Stencils. Power Pasting is a term used for pasting more than one panel of card stock at a time. This technique is achieved by securing your stencil to your protective table covering with removable tape and sliding your panel underneath it. Secure the other three edges, paste your panel, lift your stencil, remove the panel, insert your next panel leaving the original piece of tape at the top. Continue the steps until your stencil needs cleaning. I have found that after four panels, the stencil need to be cleaned. This is a great technique when your making more than one of a design.
Once the Glossy Black Embossing Paste dried, I cut enough Stampee Foil in Silver Mesh to the size of my background. I placed the foil over the dried paste, placed in a folded piece of printer paper and inserted into a HOT laminator. The pressure and the heat from the laminator secured the foil to the paste. Once the piece is removed from the laminator, simply peel the foil from the design.
Stampee Foils also has a Bonding Powder that works as a glue for the foils. The same design (minus the black paste) could also be achieved by dry embossing your design and while your stencil is still in place, apply embossing ink to the embossed area, sprinkle Bonding Powder over embossing ink, heat with a heat tool and place foil where desired , insert into folded printer paper and place in HOT laminator, then peel the foil off of the design.
Stampee Foils are available in many silver "textures" and many metallic colors. A fun product to use with dramatic results.
My simple set of four cards made in less than 30 minutes (minus paste drying time).
Supplies Used:
HOT LAMINATOR (Purple Cow)
Stencils: Wise Men, LL306 (Dreamweaver Stencils)
Embossing Paste: Glossy Black (Dreamweaver Stencils)
Foils: Silver Mesh (Stampee Foils)
Stamps: Tis the Season Perfectly Clear Set (Stampendous)
Take the time to check out what our team created this week to inspire you to join us in the Christmas in August challenge!!!
Thank you for stopping by and have a blessed day!!!


7 comments:
Wow, these are beautiful Wendy! Love the look of the foils on this!
I had never imagined doing this stencil in this way...but WOW this is really wonderful and it sounds like it went really smoothly and quickly. Thanks for the inspiration Wendy.
Great tutorial on how to use the Stampee Foils with gorgeous results. I love the holographic look. I bet it is stunning person! Great job and welcome back!!! You've been missed.
The foil technique with this image is very cool! Love the contrast against the black.
Very pretty card Wendy...never heard of Stampee!
great card.
Incredible use of colors and a new technique some of us, at least, haven't seen before. Thanks!
Post a Comment