Wednesday, August 31, 2011

Dreamweaver Stencils & Woodware Hop Across the Pond & Back

The Dreamweaver Design Team is partying with the UK Woodware Design Team to bring you innovative ways to use our wonderful Dreamweaver stencils and supplies all week long! By the end of the week, you'll have seen stencils used in inspirational ways you just couldn't have imagined, and you'll see that, although our stencils are wonderful for paper crafting, they have SO MANY other uses too! We'll have several posts a day for you, from Monday August 29th to Saturday September 3rd. At the end of our celebration, each designer will randomly select a winner from all blog comments to receive a free Dreamweaver stencil. We look forward to you partying along with us!

Here's my entry for today:

Dreamweaverblog-hop

I had a good time with this one.

To get my project started, I paste embossed the Daisies stencil (LL548) with Regular Embossing Paste (DEP) and set aside to dry. In the meanwhile, I grabbed my new Rolling Hills (LJ910) background stencil and my Copic Air Compressor.  I taped my stencil to my paper with removable tape and started airbrushing the fabulous Copic color over the top of my stencil.  Once I was happy with my color, I removed the stencil and stamped the sentiment.

After about 30 minutes.  My daisies were dry, so I replaced the clean stencil over the dried paste and colored the flowers with Brilliance pigment inks and a stencil brush.

Once I had reached the desired look, I cut out the daisies so I could separate them on my card.

I hope you enjoyed my project.  If you just happened upon my blog today, you can see all of the Dreamweaver Stencil and Woodware goodness by following the links below.

Dorothy

Kristi

Laura

Louise

Wendy

The more comments you leave on the designers blogs, the more chances you have to win a prize from Dreamweaver Stencils!!!

Enjoy the hop across the pond and back!!!

Supplies:

Paper: Coredinations, Bazzill Basics Paper

Ink: Copic, Tsukeniko

Stencils: Rolling Hills (LJ910), Daisies (LL548)…Dreamweaver Stencils

Embossing Paste: Dreamweaver Stencils

Stamps: Cling TLC Blessing (Stampendous)

Die Cut: Japanese Lace & Flourish Frame (Cheery Lynn Designs)

Tuesday, August 30, 2011

Dreamweaver Stencils & Woodware Hop across the Pond & Back Blog Hop!!

The Dreamweaver Design Team is partying with the UK Woodware Design Team to bring you innovative ways to use our wonderful Dreamweaver stencils and supplies all week long! By the end of the week, you'll have seen stencils used in inspirational ways you just couldn't have imagined, and you'll see that, although our stencils are wonderful for paper crafting, they have SO MANY other uses too! We'll have several posts a day for you, from Monday August 29th to Saturday September 3rd. At the end of our celebration, each designer will randomly select a winner from all blog comments to receive a free Dreamweaver stencil. We look forward to you partying along with us!

Here's my entry for today:

Dreamweaver-Stenciled-Frame

This 14 x 14 frame was sooo fun to stencil.  As I kept stenciling, I kept smiling, bigger and bigger.  I knew that I was going to LOVE IT!!! It was easy too!!!

I started by painting a wood 14 x 14 frame with black acrylic paint.  Once dry, I stenciled our Black Eyed Susan stencil (LJ902) multiple times with Regular White Embossing Paste (DEP).

IMG_8113IMG_8112

Regular Embossing Paste dries quickly.  This project from start to finish was about 2 hours.

Once the embossing paste had dried, is was time to add some color to my Black Eyed Susan’s. 

My intention for this frame is to make a chalkboard to hang in my kitchen, so I chose Shiva’s Paintstiks Basic Color Set 6.  I placed my Black Eyed Susan stencil on top of the dried paste and started coloring with a stencil brush and my Paintstiks.  Lynell Harlow has some fabulous tutorials in her new DVD using Paintstiks.

Once I had color where desired, I added in the floral arrangement. 

I am the end of today’s hoppers, but if you just happened along my blog today, start at Lynell Harlow’s blog Dream It Up, for easy, one click hopping.

Lynell

Pam

Siobhan

Wendy (<----Me!!)

You can find all the supplies you need here at Woodware, and Stencils with Style.

Thank you so much for hopping across the pond and back this week.  Take the time to take a look each day and leave some love.  Each designer will be giving away a Dreamweaver Stencil prize to a random commenter on Sept.3rd.

Supplies Used:

Wooden Frame: Canvas Corp

Acrylic Paint: Delta

Stencil: Dreamweaver Stencils

Florals: Craft Supply

Ink: Shiva’s Paintstiks (Dreamweaver Stencils)

Paste: Regular Embossing Paste (Dreamweaver Stencils)

Chalkboard: Chalkstock (Canvas Corp)

If you live in Missoula or Helena, Montana, I will be teaching how to make this frame on September 25th at Memory Lane Scrapbooking (406-523-3957) in Missoula, Montana at 12pm, and November 5th at Memory Trail (406-442-4330) in Helena, Montana at 10am.  Please call the store to register for your class!!

Thanks for stopping by today!!!

Skipping Stones Design Sketch Challenge #91

Today is bittersweet with a few goodbyes!!

First of all we have to say goodbye today to our fabulous August Sketch Artist Teri Anderson and the fabulous guests that came along with her this month…

Stephanie Mino, Kryssi Ng, Maureen PlutKaren Baker

In addition, we will be saying good bye to the fabulous Design Team that has been designing fabulous samples using Skipping Stones Design stamps for the last year.  Please go to each of their blogs and give them a gracious goodbye!! 

Be sure to check the Skipping Stones Design blog on Friday for the introduction of our new Design Team!!!

Here is my SSD Sketch Challenge #91

SSD91-2

Teri’s sketch this week, was really off my comfort zone, but oh well…I just went with it and was happy I did.

I punched out some circles with a 1 3/4 inch circle punch and stamped them with the fabulous music notes from the Heartsong set.  I then ran the circles through the Xyron sticker maker (thanks for the inspiration Lynn Mercurio).  Once these little guys were stickers, I covered them with Multi Crystal Ultra Fine Glitter from Stampendous.

SSD91

I stamped the darling songbird and sentiment (both from the Heartsong set) on the panel and then adhered my circles.

The colors I chose this week were from the Color Throwdown….

Here is Teri’s Sketch….

91

Please take a few moments to visit all the wonderful SSD Deisgners…

Amy

Barb

Brenda

Gladys

Jennifer

Kandi

Wendy (<---You’re here)

and our Guests….

Teri Anderson

Maureen Plut

Karen Baker

Stephanie Mino

Kryssi Ng

See you on Friday for the announcement of our new SSD Design Team!!

Monday, August 29, 2011

Dreamweaver Stencils & Woodware UK Across the Pond & Back Blog Hop!

Click here for my Stampendous Blog Candy Post!!!

All this week, my beloved Dreamweaver Stencils Dream Team will be hopping with Woodware Craft Collection Design Team.  Woodware  is a distributer of crafting products in the United Kingdom!!

During this hop you will see fabulous and innovative ways to use Dreamweaver Stencils.

We will hop everyday from Monday, August 29th to Saturday, September 3rd.  Take a walk by each designers blog each day and leave some love.  At the end of the hop, each designer will pick a random commenter to win a Dreamweaver Stencil prize.

Here is the list of “hop stops” today…

Debbie

Deborah

Kristi

Liz

Enjoy the hop!!!!

Woodware UK & Dreamweaver Stencils Blog Hop!!

For my Stampendous Blog Candy post, please cling on this link!!

All this week, my beloved Dreamweaver Stencils Dream Team will be hopping with Woodware Craft Collection Design Team.  Woodware  is a distributer of crafting products in the United Kingdom!!

During this hop you will see fabulous and innovative ways to use Dreamweaver Stencils.

We will hop everyday from Monday, August 29th to Saturday, September 3rd.  Take a walk by each designers blog each day and leave some love.  At the end of the hop, each designer will pick a random commenter to win a Dreamweaver Stencil prize. 

Here is the list of “hop stops” today…

Caz

Lee

 Laura

Pam

Enjoy the hop!!!

Saturday, August 27, 2011

Last Blog Candy Giveaway…but MORE *FUN* to come…..

First of all, lets announce a WINNER…

Carol B. said…”Beautiful card! I love your coffee distressing idea, so clever!”

Thanks Carol, I wish I could take credit for it being my “idea”, but I was taught that by Fran Seiford , owner of Stampendous

This week, I couldn’t stop the Stampendous stamps from hitting the ink pad.  I was having a great time with all of the stamps that have been released in our new catalog, as well as some Limited Edition stamps that you can only get until they are gone.  You can see the new Christmas Jumbos on Stampendous.com or click this link. The first six sets are the Limited Edition.

Here is one of my creations with Cling Jumbo Holly Season (CRS5023).

Stampendous82711-3

Cling Jumbo Holly Season has a large Season’s Greeting sentiment, so I chose the smaller version Cling Scrolled Season.  Same stamp, only smaller.  In another post, I will show a creation using the larger sentiment.

This week, my good friend Taylor Usry, was the guest hostess for the Splitcoast Stampers sketch challenge.  So both of the cards that I am posting today are in support of her.

My Season’s Greetings card was fun and simple to make.

First I cut my background panels to the desired size.  Using embossing ink, I stamped the gorgeous Holly border stamp on the background panels and a border from the Elegant Border Perfectly Clear set on the front panel.  I sprinkled Detail Gold Embossing Powder over the all of the images and heat set.

For the sentiment, same process, except I used Jade PearLustre  Powder over the embossing ink.   I just love the pearly sheen of PearLustre Embossing Powder.

Once all my panels were adhered to my liking, I wrapped a big red bow around it and placed what I think is a button cover, in the center of the bow.

Here is a supply list:

Paper: Killarney, Kisses, Kraft (Bazzill Basics)

Stamps: Cling Jumbo Holly Season, Scrolled Season, Perfectly Clear Elegant Borders (Stampendous)

Embossing Powder : Jade PearLustre, Detail Gold (Stampendous)

Ink: Versamark (Tsukineko), Antique Linen (Ranger), Gold Krylon Pen

Extras: Ribbon (craft supply), button cover (stash)

Please leave a comment on this post to win the Cling Jumbo Holly Season stamp set.  I will give away this set to one lucky commenter next week, when the Stampendous Design Team make s BIG & FUN announcement!!

I normally don’t use the same sketch twice, but I was loving the Splitcoast Stampers Sketch Challenge so much, I made two cards…

Stampendous82711-2

This card started out the same.  I cut the background panels to the desired size and stamped the fabulous Chandelier Perfectly Clear and the Eiffel Tower Perfectly Clear Stamp sets.  They are fabulous, take a look..


For the front panel, I chose the Lace Light Deco Border Die from Cheery Lynn Designs and cut four borders, two different colors.  Once they were cut, I layered them on a skinny panel of cardstock and aged them a bit with Distress Ink.

I wrapped some coordinating shimmery seam binding around it and added a tiny sentiment from the Poppy Bottles Perfectly Clear stamp set…

I then did something that I never do.  I found this darling little crown in my stash of finds, it was out of the package, so I am going to gather it may be from Tim Holtz Ideology, but can’t be sure.  The tiny crown was silver, which didn’t match the little ring that my sentiment was hanging on, so I covered the crown with white pigment ink and then dipped it in the NEW Aged Gold Embossing Enamel and heat set it. 

Closer look?  Sure….

Stampendous82711

Oh my goodness, I just fell in love with it.  I’m sure doing little things like that are old news to you pros, but I am a SLLOOWW learner.

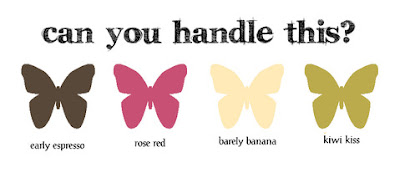
What do you think of those colors???  I picked them up from The Play Date Café….

Here is a list of supplies that I used on my card:

Paper: Papertrey Ink

Stamps: Poppy Bottles Perfectly Clear, Chandelier Perfectly Clear, Eiffel Tower Perfectly Clear Stamp set (Stampendous)

Ink: White Brilliance Ink, Memento Rich Cocoa (Tsukeniko)

Die Cut: Lace Light Deco (Cheery Lynn Designs), tag punch (craft supply)

Embossing Powder: Aged Gold Embossing Enamel (Stampendous)

Extras: seam binding (Etsy), charm (Unknown)

Thanks so much for stopping by today.

Want to throw your name in the hat for a few more chances to win FREE Stampendous, check out these AMAZING ladies blogs…

Wendy Price

Pam Hornschu

Taylor Usry

Cyndi Bundy

Lynn Mercurio

Check back next week for our BIG & FUN announcement!!!!

Thursday, August 25, 2011

Dreamweaver Stencil Dream Team Free Week!!!

Here we are again, Thursday…another week almost biting the dust.

Thursday for me means that the Dreamweaver Stencils Dream Team gets together and posts fabulous creations using Dreamweaver Stencils.

This week I chose a LS1008 Small Hope Character and LL3018 Large Hope Character.

Here is my simple card…

Dreamweaver82511

I simply pasted embossed the Large Hope Character Stencil with Glossy White Embossing Paste.  While that was drying, I ran the Small Hope Character stencil through the Vagabond machine with red aluminum.  I sanded off the embossed areas and adhered the aluminum to two squares of Grungeboard.  I then placed them in the front of the card using dimensionals.

Please take the time to check out the other members of the Dream Team creations this week.  You can see the blog roll to the right of this post.

Have a great day!

Tuesday, August 23, 2011

Blogs for Boobies…Last Day to Place Your Bid

Skipping Stones Design Sketch Challenge #90 post …Click Here

Welcome to the last day of blogs 4 boobies!

There us still time to join in on the fun(draising)!!!! There are two ways you can help:

#1 There is still time to bid on my project:  Here is another look at what I have up for auction.  
The auction will end at 8:00 p.m. Mountain time August 23rd.
The highest bid is currently $20
To win this simply bid more than $21 in the comment section of THIS post.  YOU MUST INCLUDE your EMAIL ADDRESS with your $bid. ( This way we can get in contact with the winning bidder.)
Remember 100% of what you bid will go to the Komen foundation!!! If you are the top bidder you will receive a paypal invoice for the amount that you bid.
#2  There is still time to shop!!!  Through midnight on the 23rd of August Skipping Stones Design is still donating $2 (to theKomen Foundation) for every stamp set sold
Together we can make a difference!!!

Skipping Stones Design Sketch Challenge #90

Hi there….

Teri Anderson has gave Skipping Stones Design another beauty…

90

I had such a great time with this sketch.  I was able to incorporate THREE Skipping Stones Design sets !!!

SSD90

I used Rustic Tiles, Dandelion Dreams and Victorian Summer.  By the way, Rustic Tiles is on sale right now!!

I was inspired by CR84FN Color Challenge

Please take the time to visit the rest of the Design Team as well as our fabulous SSD Guest Designers…

Brenda

Kandi

Barb

Jingle

Gladys

and our Guests

Teri

Maureen

Stephanie

Kryssi

Karen

Thanks for stopping by and I hope you will have a chance to play along with our sketch challenge at Skipping Stones Design.

Monday, August 22, 2011

Some Challenge Posts….

Good morning!!

I have had a chance to play along with some challenges in the past week, that I normally don’t have time for. 

A sketch challenge that I love playing along with is Viva La Verve Sketch Challenges at Splitcoast Stampers!!  I love Verve Stamps and can’t resist their New Releases every month.

Here is the card I made for Viva La Verve Week Three, colors from the Playdate Café and the inspiration from Bible Verse Thursday at Christian Paper Crafts.

VLV-BVT119

Here is the color inspiration from the Play Date Café

The current week challenge for Viva La Verve is up right now on Splitcoast Stampers.  Here is the great sketch…

For this project, I chose colors from the Color Throwdown

Here is my creation…

VLVAug2011week3

Thanks for taking the time to stop by today and see my color & sketch challenge cards.  I love my Verve Stamps.  Check out the newest release, which I think is still on sale for the next few days!!

Have a great day!

Supplies : Philippians 1:8

Paper: Neptune Dotted Swiss, vellum (Bazzill)

Patterned Paper: 6x6 Hostess pack (Stampin’ Up), Porcelain (Basic Grey)

Stamps: Philippians 1:8 Plain Jane (Verve)

Ink: Versafine Black Onyx (Tsukineko)

Die Cut: English Tea Doily (Cheery Lynn Designs)

Extras: hat pins (Maya Road, Dreamweaver Stencils), ribbon (craft supply), brads (Creative Impressions)stitching (Singer), clear detail embossing powder (Stampendous)

Supplies: Sorry For Your Loss

Paper: Java (Bazzill), Rose Red, So Saffron, Kiwi Kiss (Stampin’ Up) white (Georgia Pacific)

Stamps: Making a Statement (Verve)

Ink: Versafine Vintage Sepia, Versamark (Tsukineko), Early Espresso (Stampin’ Up)

Dies: Tag (Marianne Creatables), border (Heartfelt Creations)

Extras: embossing folder Flourishes (Spellbinders), liquid pearls (Ranger) seam binding (Stampin’ Up), button (craft supply)


Saturday, August 20, 2011

Stampendous Saturday…Winner Announced & more Stampendous Blog Candy!!

Good morning!!  Welcome to Stampendous Saturday!!  You all are probably getting used to the drill by now!!  Myself and some of my fabulous Design Team Sista’s from Stampendous,  post our creations and give away some awesome Stampendous stamps!!!

First off, here is the winner from last week’s post that was randomly picked from Random.org

Stephanie said…

What a gorgeous tag!! Wow! It's amazing. Thanks for the chance to win!”

Thanks for your kind comment Stephanie.  Please email me (wendyjo72@gmail.com) your mailing information and we will get stamp off to you!!

I have been working on putting together two classes for World Card Making Day, featuring Stampendous products.  This card is one of the cards that I will be teaching.

Stampendous-thermoacetate

I am so in love with distressing my own papers using instant coffee and water mixed together.  You can view a fabby video Coffee Talk with Fran on You Tube.

I love the coffee staining technique so much, I have started staining pages (8.5 x 11) at a time.  That way I have a piece ready at all times.

I stained a piece of Kraft cardstock with instant coffee and warm water.  Once the staining was dry I stamped the  Stampendous Dragonfly Vine in Versafine Sepia.  I then distressed the edges with Distress Walnut Stain.

Using the same focal image stamp, I stamped in embossing ink on Stampendous Thermal Acetate.  I sprinkled Kaleidoscope Embossing powder in the dragonflies wings and Aged Copper Embossing Powder on the body.  Once all was melted, and dried, I cut out just the dragonfly from the acetate. There was enough opaque area on the dragonfly to place a tiny dimensional foam sticker to raise him from the original image.

I wrapped some pretty May Arts ribbon around the project and place a trinket pin with copper beads from the center of the bow.

This week I will be offering the fabulous Stampendous Cling Dragonfly Vine.

Please leave a comment for your chance to win this stamp from Stampendous.  I will announce a winner next Saturday, when I post our last Blog Candy post.  Don’t worry though, you will still get some fabulous inspiration from Stampendous on Saturdays.  Check out these blogs for more chances to win more FREE Stampendous

Pam Hornschu

Cyndi Bundy

Taylor Usry

Wendy Price

Supplies:

Paper: Kraft, Copper Metallic (Bazzill Basics Paper)

Stamps: Cling Dragonfly Vine (Stampendous)

Ink: Versafine Sepia (Tsukineko)

Ribbon: May Arts

Extras: 2oz. Spray Bottle (Stampendous), Trinket Pin (TH Ideology Ranger), Beads (Craft supply), Kaleidoscope & Aged Vintage Copper Embossing Powder (Stampendous)

Thursday, August 18, 2011

Dreamweaver Stencils Dream Team Color-way Challenge

Good morning!!

This week the Dreamweaver Stencil Dream Team has prepared projects for a Color-way Challenge.  The challenge is to get out your stencils and make a project using Red, Ivory and Kraft colors. 

Today I was lucky enough to use a BRAND new stencil that was just released at Summer CHA, LX7003 Ornate Christmas Tree and LS92 Season’s Greetings.

Dreamweaver81811

I followed the Color-way challenge by pasted embossing the Ornate Christmas tree with Red Glossy Paste.  I mixed Gold Dust and Amber Dreamweaver Metallic FX with Pearlescent Embossing Paste and pasted embossed the Season’s Greetings stencil to give the color a “Kraft” color.  While the paste was still wet, I sprinkled some Latte Micro Fine Glitter over the top.  I added a few Liquid Pearls and gave the edge a worn look.  I matted the Ivory Pearl Cardstock onto Scarlet Red Pearl Cardstock with the card base being Kraft.

Thanks for stopping by today to take a look at my creation.

Please take the time to visit all of the Dream Team’s blogs today and see their Red, Ivory and Kraft Color-way Challenge creations!!

Supplies:

Card Stock: Red & Ivory Pearl Cardstock (Coredinations), kraft (Stampin’ Up)

Stencils: Ornate Christmas, Season’s Greetings (Dreamweaver Stencils)

Paste: Pearlescent & Glossy Red Embossing Paste (Dreamweaver Stencils)

Extras: Bisque Liquid Pearls (Ranger); Gold Dust & Amber Metallic FX (Dreamweaver Stencils); Latte Micro Fine Glitter (Elizabeth Crafts)

Tuesday, August 16, 2011

Skipping Stones Design New Release Blog Hop & Sketch Challenge #89


Welcome to Sketch Challenge #89 and the release of Everyday Blessings!

Photobucket

If you just came from Stephanie’s blog, you are in the right place. If you just happened along my blog today, start at the beginning of the hop at Skipping Stones Design. The entire hop order is there and you can hop from blog to blog with ease.

Be sure to hop along and leave comments on all the fabulous designers’ blogs. This month we are welcoming Maureen Plut, Karen Baker and Stephanie Mino to our team as Guest Designers! Teri Anderson will be providing all the fabulous sketch inspiration this month including the sketch we're using in today's hop!

I had such a great time playing with Teri’s sketch….If you check out my Blogs 4 Boobies post from yesterday, you may recognize the design!!  Here is my creation…

SSD89

We’d love to see what you all can do with our sketch.  Here it is…

89

To continue on the hop head over to Gladys’ blog for some more Skipping Stones Design inspiration!

Teri Anderson  

Tamera Beaton  

Maureen Plut  

Amy Tsuruta  

Karen Baker   

Kandi Phillips  

Barb Turpin 

Brenda Weaver  

Jennifer Ingle  

Stephanie Mino  

Wendy Jordan   <--- {{ME!!}}

Gladys Chia  

Thanks so much for taking the time to hop along!!  Now check out the Blogs 4 Boobies auction that is going on right now at Skipping Stones Design and all the participating blog.

Monday, August 15, 2011

Second Annual Blogs 4 Boobies!!!

It’s time to stamp out Cancer with Skipping Stones Design

Welcome to the second annual Blog 4 Boobies fundraiser!

This is day 1 of a 3 day blog bounce(hop) where EVERY CARD OR PROJECT is up for auction!

Last year Skipping Stones Design raised and donated $1108.99 to the Susan G. Komen Foundation. It is our goal to raise $1500 this year and WE NEED YOUR HELP!!! There are 3 ways you can join in on the fun(draising)

1. You can help by Going shopping!
For every stamp set that you purchase during August 15th through the 23rd SSD will donate $2 to the Komen Foundation. Stamping and shopping that you can feel good about ! Click Here to laugh at some of our funniest stamps Click Here to be inspired or Click here to see everything we've got!
Here are two of our favorite sets:

Photobucket Bras Volume #1 Photobucket

2. You can help by *Biding!
Another way you can help us raise money for the Komen Foundation is to *bid on a project or card along the blog bounce(hop). YES! EVERY Single card/project along the blogs for boobies bounce is up for auction. We recommend a starting bid of $5 or more. Your *Bid not only includes the card or project but shipping to your home as well. * See how to place a bid for more detailed instructions.
If you are the highest bidder August 23rd 8:00 p.m. mountain time then you WIN the card/project that you bid on.
3. You can help by Telling Your Friends~
Help us spread the word about "blogs 4 boobies" the more people that know, the more money we can raise!!!
If you have a blog feel free to copy and paste part or all of our Blogs 4 Boobies posts.
 
Here is my *SET OF FOUR* cards that will arrive at your door with envelopes.  All four cards have been made with Skipping Stones Designs Bras Volume One & Two…
SSDBlogs4boobies
*"How to place a bid on my card/project"
Step #1
Find the comment section of the blog that shows the "Blogs 4 boobies" card or project that you want to buy. *Please note you may only bid on the card/project shown in the specific "blogs 4 boobies" post. *Any bids not placed on the correct post will be considered invalid.
Step #2
Once you are in the "blogs 4 boobies" comment section fill in the dollar and cents amount of what you are willing to pay for the card/project. We recommend a starting bid of $5 or more. Remember your bid includes shipping as well as the card/or project. 100% of the money your bid will go to the Susan G. Komen Foundation
Step #3
Next to your $ bid please type in your email address. During a silent auction bidders sign their name next to their bid. Typing your email address is the electronic equivalent of signing your bid. Also it will help the blogger contact you if you are the highest bidder.
Step #4
Watch and wait.
Once you have entered your bid/comment sit back and wait. If someone out bids you then you may bid again. Bidding will continue until 8:00 p.m. Mountain time August 23rd
* Please note that the participating stampers/bloggers will probably re-post their Blogs 4 Boobies card/project on the 23rdof September. When the blogger re-post their project then the bidding will continue on the NEWEST post and that comment section.
"What do I do once I place a bid"
Watch and Wait
The "Winner of the Auction" Will be the highest bid (that includes an email address)in the comment section of the MOST RECENT blogs 4 boobies post at the end of the silent auction. Please note that ALL cards/projects WILL BE REPOSTED on the 23rd of September. The silent auction will end at 8:00 p.m. Mountain Time on August 23rd .
Things to keep in mind:
Near the end of the bidding you may not see bids as they come in. Most blog have a comment feature where the blogger must approve comments before they are published. So bid high. You might have the highest bid that is published, but someone might have outbid you in an unpublished comment/bid.
The blogger/designer will declare who has won the silent auction. Skipping Stones Design will send you an invoice for your donation/bid amount. Please pay that invoice as soon as possible, so the designer can get your card/project in the mail to you.
Remember 100% of your bid will be donated to the Susan G. Komen foundation.
You should have come to me from Michelle Gross’s blog.
Next you are going to visit Sarah Martina Parker's blog
Here is the list of today's participants: make sure to come back the next two days and check out our other amazing designers,cards, and projects.

Day #1:

Have fun bouncing from blog to blog. Enjoy all the designs, and make a bid or two! This is a rare opportunity to take home a
card(s)/project from your favorite designer, and fight the war against breast cancer!!!

Together we can make a difference!!!

Saturday, August 13, 2011

Stampendous Saturday!!! A Blog Candy Winner & ANOTHER Giveaway!!!

Good morning my bloggin” friends!!

I have another Stampendous giveaway as well as a winner to last week’s giveaway!!!

This past week “thestampinglady” left this comment…

That's a great card Wendy! I really like those border stamps that make such wonderful statements on cards. I am already a subscriber to your blog--don't want to miss a post. Thanks for a chance to win.

Thank you for the kind words!!  You’re the winner of Stampendous’s Perfectly Clear Elegant Borders.  Please email (wendyjo72@gmail.com) with your mailing information so I can get this set off to you!!

Today I am sharing a tag that could totally double as a card.  I had a really good time stamping and using Distress Stain on this little project…

Stampendous-Tag

I started by stamping Stampendous Cling Flowerfly (CRQ132), three times on the manilla tag with Versamark and heat embossing the image with clear embossing powder.  If you have used Distress Stains, you know that they have the handiest little daubers on the end of them.  I simply started coloring in the area’s that I wanted color with the Distress Stains daubers.  Once I had desired coverage, I stamped the Stampendous Music Score in the background with Versafine Sepia ink.

I don’t know if you know this but Stampendous sells Thermal Acetate.  What that means is you can stamp and heat emboss on ACETATE!!  Cool huh!!  So I stamped the Flowerfly on the acetate and embossed with multiple colors of Stampendous embossing powders.  I then cut out the image and adhered the Flowerfly image to a tiny little paper bag that I stuck a bit of a card that says “Hello” from the Perfectly Clear Happy Messages set.  I adhered some pretty Creative Impressions jewels to the front of the bag.

I sprayed the front of the tag with some super cool Goosebumps by Tsukineko that  adds some texture and adhesive to the front of a project. While the Goosebumps was still wet I sprinkles some new Stampendous Fran*tage Mica fragments over the front.  This image doesn’t show off the cool texture of shimmer of the Mica.

OK…..down to the fun…Leave a comment here for your chance to win Stampendous’s Cling Flowerfly…

It’s as easy as just saying hi in the comment section!!

You could score some more Stampendous stamps by commenting on these fabulous gals blogs…

Taylor Usry

Pam Hornschu

Cyndi Bundy

Wendy Price

I hope you have a great weekend and be back Monday with a Blog Hop for a good cause!!!

Thursday, August 11, 2011

Dreamweaver Stencils Dream Team Free Week!!

Hey there!!! 

Welcome to Dreamweaver Stencils Dream Team Free Week!

This week I chose a stencil that was recently released at Summer CHA…Opto Checkboard (LJ915)

Here is my creation…

I can’t quite figure out if this is hard to look at or not…

Dreamweaver81111

The background of the card was paste embossed with the Opto Checkboard and Glossy Black paste.   I then die cut some flowers from a Sizzix die and started Zentangling them.  At the time that I did both of the above steps, I didn’t think about putting the two elements together.  That revelation came days later.

You have to let me know…does it hurt your eyes? 

None the less, I love the background and I have so many more ideas for it!!

Please take the time today to check out the other Dream Team members blogs.  You can find a list of their links to the right of this post.

Have a great day!!!

Tuesday, August 9, 2011

Skipping Stones Design Sketch 88

FOR THIS WEEK’S STAMPENDOUS BLOG CANDY POST CLICK HERE

Welcome to Tuesday, Skipping Stones Design Sketch Challenge day!!!

Once again Teri Anderson has pulled out all the stops and gave us this beauty…

88

Oh my goodness the possibilities!!!!

Here is my rendition….

SSD88

I used a FABULOUS new Skipping Stones Design set that is going to be released next week called Everyday Blessings!!!  You are going to LOVE IT!!!!!

Play along with us this week for a chance to win a FREE Skipping Stones Design set of stamps!!  All you have to do is upload your creation made after Teri’s sketch and you’re ready to go.

Check out what the SSD Design Team has created this week…

Amy

Barb

Brenda

Gladys

Jingle

Kandi

Tamera

and our Guests…

Teri

Karen

Maureen

Stephanie

Kryssi

We can’t wait to see your creations!!  Thanks for stopping by today!!  I hope you have a GREAT day!!!

Saturday, August 6, 2011

MORE Stampendous Blog Candy & a WINNER

Let’s start right off with the winner of last week’s Blog Candy….

FRANCINE B!!!

Thank you so much Francine for leaving me a comment and following my blog!  You are the winner of the Cling Penguin Wishes Set.

Now on to our next giveaway.  The card that I am showcasing today was made the Stampendous July 2011 catalog.  This is card is simply made with a bit of ink and the fabulous Stampendous Class A Peel stickers.

Stampendous17

Here are a few easy steps I did to achieve this card…

I stamped the beautiful border from the newly releases Stampendous Perfectly Clear Elegant Border set (SSC1122) with red pigment ink and heat embossed clear detail embossing powder over the image.

The sentiment is are stickers from Stampendous Mirror Red Jumbo Merry Class A Peel’s.  They are fabulous.  I tied a ribbon around the whole thing, placed some Stampendous Red Dot Sparklers in random places and I was finished!!

For this week’s Blog Candy, Stampendous has generously donated Elegant Borders to one lucky commenter…

Please leave a comment here by August 12th and on Saturday August 13th, I will announce a winner and another giveaway!!!  Stampendous is so generous.  I am so blessed to get to work with them!! 

I am also having a giveaway when I reach 300 blog followers.  Please start following my blog and I you will receive an extra entry in the comment to win giveaway this week.

You can find more Stampendous Blog Candy by visiting

Taylor Usry

Wendy Price

Pam Hornschu

and

Cyndi Bundy

I hope you have a great day that includes lots of stamping!!!

Thursday, August 4, 2011

Dream Scheme Thursday Sketch Challenge!!

Good morning!!

It’s Thursday and that means Dreamweaver Stencils Design Team has posted some fabulous creations on their blogs!!  Today we were challenged to a Sketch Challenge.  Here is our sketch…

Here is  my creation….

Dreamweaver8-4-11

Lately, I don’ t  know if my obsession with leopard skin and zebra stripes has anything to do with my addiction to The Real Housewife's of Orange Country, New York City or New Jersey, but I can’t seem to get enough.  I have bought some zebra ribbon, some zebra patterned flip flops, a few leopard skin patterned shirts and I haven’t quite been able to bring myself to by a zebra striped purse yet. 

Anyhooo, I fell in love with the Zebra Texture Stencil (LJ815) had to get it, had to use it right away!!  I had to make this card quickly late last night so I simply paste embossed the stencil with Glossy White Embossing paste onto black cardstock and sprinkled transparent Multi Crystal Glitter over the top while is was still wet.  Once dry, I cut the background into fours and adhered to the background. As for the sentiment, I die cut the sentiment panel paste embossed Thank You (LJ691) with Glossy Black Embossing Paste.  I used dimensional foam to “pop up” the sentiment panel. The tiny black dots around the sentiment are puff paint from Walmart.

Thanks so much for stopping by today.  Please take the time to visit the  my Design Team sister’s blogs and see how they answered the call to the sketch.  You can find a list of their blogs to the right of this post.

Have a great day!!!

Supplies:

Paper: White (Georgia Pacific), Black Pearl(Coredinations)

Stencil: Thank YouLJ691, Zebra Texture LJ815 (Dreamweaver Stencils)

Extras: Glossy Black & Glossy White Embossing Paste (Dreamweaver Stencils), Crystal Snow Glitter (Stampendous), Fancy Tag Two Die Cut (Spellbinders), Puff Paint (Plaid)

Tuesday, August 2, 2011

Skipping Stones Design Sketch Challenge and NEW Guests!!!

Zippity Do Dahhhh, Zippity Yah!!!

Good morning!! I am so happy to announce Teri Anderson as our August sketch artist and some ~*~FABULOUS~*~ New Guest Design Team Members.

Without further a do..Here they are…

Teri Anderson <—Sketch Artist!

Karen Baker

Maureen Plut

Stephanie Mino

Kryssi Ng

Sketch 87 is going to ROCK your socks off…check it out…

87

Here is my card…

SSD87

I chose to use Healing Wings as my stamp choice this week. I think it is the time of year, but I am always in the mood for a good butterfly and this set has a few great ones. I have also been so inspired by the June release of Worth Remembering by Bazzill Basics. If you haven’t seen it yet, you can view the entire collections here. Be sure to ask your LSS to send you to the “Worth Remembering” line. Here is a sample of the papers…

303881-Outlined

This one is my FAVORITE!!!

I hope you are inspired to run to all of the Skipping Stones Design Team’s blog and all of our guests and get inspired to play along with us for Sketch 87. SSD always gives a good prize!!!

Here is our Design Team…

Amy

Barb

Brenda

Gladys

Jennifer

Kandi

Tamera

and our Guests…

Teri

Maureen

Karen

Stephanie

Kryssi

I hope you have a great day!!!

Happy Creating!!

Supplies:

Paper: Bazzill Basics

Stamps: Healing Wings (Skipping Stones Design)

Ink: Versamark (Tsukineko)

Extras: Ribbon (SU), Red Tinsel, Blue Tinsel , Detail White Embossing Powder (Stampendous), eyelets (craft supply), bakers twine (The Twinery), flower (Recollections)