Friday, January 27, 2012

Skipping Stones Designs Feature Friday

Good morning!!  As you read this, I will be basking in the California sun, waiting for my favorite show of the year to start!!!

This month Skipping Stones Designs is featuring Grunge.   If you have recently picked up an issue of Stamp It Three Ways by Paper Crafts, you will see three fabulous cards made with Grunge.

SSDFF12612

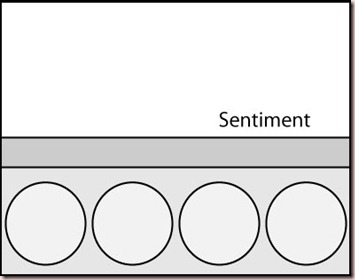
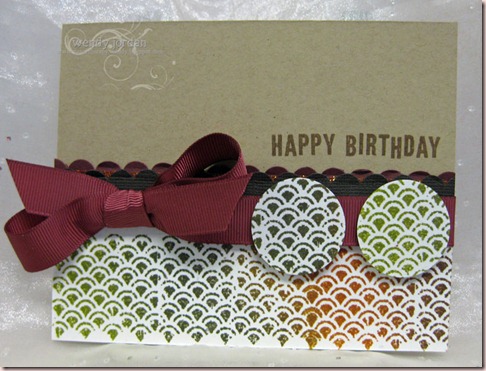
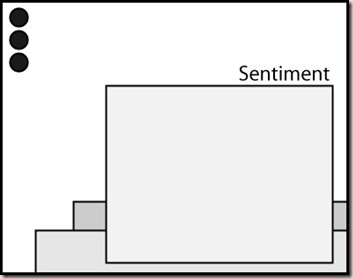
I patterned my card after this week’s sketch by Pamela Young…

SSD112

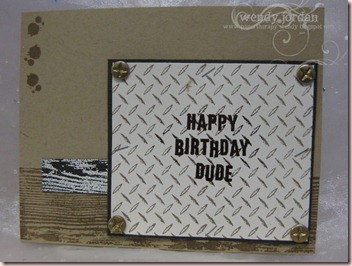
My beloved husband is a General Contractor, so he is a REEEAL touch guy, if you know what I mean.  I can’t give him a cutsie card, or anything with flowers or cats on it, so this is the perfect go to set for cards,  for him.  I am also super excited about Grunge 2.  Now I have more stamps to choose from to make more cards for Hubs.

Grunge is on sale this month for $14.49.  A perfect time to pick it up!!

Also, please play along with our fabulous sketch challenge.  Link up your creations to the SSD blog!!  We can’t wait to see what you create!!

Thanks for stopping by today!!

Thursday, January 26, 2012

Dream Team Thursday!!! Another Sneak Peek!!


Oh the excitement is building!! Only three  more days until CHA begins!!! I am so excited to see my friends!!

So…to keep the excitement rolling, myself and the rest of the team are showcasing some amazing creations made with the Dreamweaver Stencils New 2012 Release…

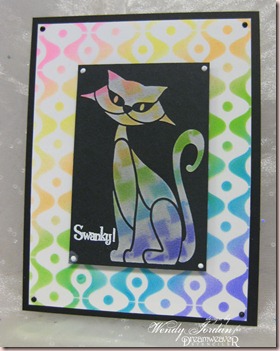
Swanky-Kitty

Of all the cards I made with the new designs, I think that this one is my favorite!!

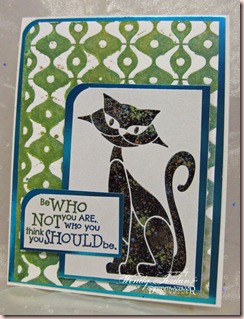
I started by paste embossing Retro Sitting Cat (LL3020) with Regular Embossing Paste, while that was drying, I placed Waved and Dots (LX7012) on Glossy Cardstock and adhered it with Removable tape.  I started airbrushing color with the Copic Airbrush System over the stencil.  When I took the stencil off, this is what the airbrushed color left.

Once the paste embossed Cat was dry, I placed the clean and dry stencil over the top of the paste again, and then  taped the Pinwheel Checkerboard (LX7013) over the paste embossed Cat.  I again airbrushed color over the pinwheel checkerboard stencil, so when removed, just the pinwheel design was left.

Now…remember the step where I airbrushed the glossy paper through the Waves and Dots stencil?

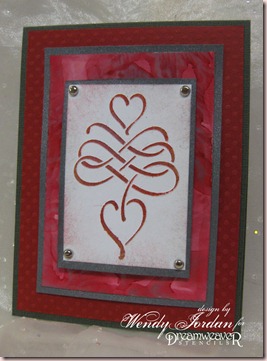
DW-Negative-Zentangle

Here is the negative of that colored stencil.  I simply spritzed the stencil with Colorless Blender solution and flipped it over onto another panel of cardstock and roll over the stencil with a brayer.  Two different cards with one coloring technique. 

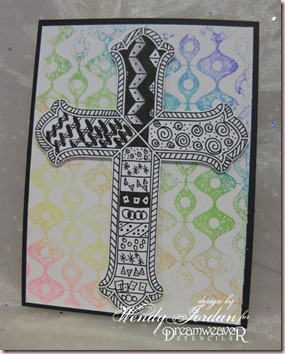
The Open Cross Stencil (LJ918) was Zentangled and adhered to the airbrushed panel with dimensionals.

Please take a look at what the other members of the Dream Team have been up to with their new stencils…

Lynell Harlow…Dream It Up

Pam Hornschu

Laura Drahozal

Kristi Van Doren

Liz Martin

Cyndi Bundy

Cherylynn Moser

Jessie Hurley

Lee Kellogg

Georgia Sommers

Louise Healy

Terrece Siddoway

REMINDER….this is the last week of our Valentines Day challenge.  Link your creation to Dream It Up for your chance to win a Dreamweaver Stencil prize!!!

Wednesday, January 25, 2012

Dreamweaver Stencil Sneak Peak!!!!!


Hey everyone….MORE sneak peeks from Dreamweaver Stencils today!!

This Sunday, these two stencils will be released at CHA…


DW-Memory-Mist-Tangle

I again used the Faux Letterpress technique on the  Flower Quatrefoil (LX7010)  background and Zentangled the new Open Cross Stencil (LF918).

Want more sneak peeks…

Lynell Harlow

Pam Hornschu

Kristi Van Doren

Lee Kellogg

Laura Drahozal

Cyndi Bundy

Cherylynn Moser

Louise Healy

Jessie Hurley

Terrece Siddoway

Liz Martin

Tuesday, January 24, 2012

Skipping Stones Designs

Hey there!!!  It’s Tuesday and that means a new Skipping Stones Designs Sketch by the fabby Pamela Young

SSD112

Here is my rendition…

SSD112

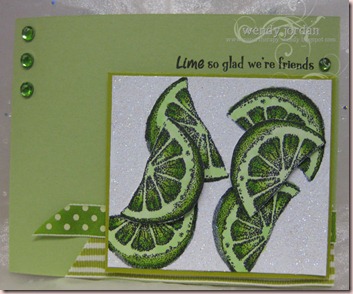
I love the SSD Friendly Fruit set.  I have vowed to use it more.  I colored my limes (which can also be lemons or orange wedges) with Copics and then adhered glue pen all round the colored fruits and sprinkled Stampendous Multi Crystal glitter all over.  I popped up two more limes with dimensionals.

Check out what the other Skipping Stones Designs team members did with Pam’s sketch…

Jingle

Joann Valderama

Kandi Phillips

Karen Baker

Katie Gehring

Taylor Usry

Wendy Price

Wendy Jordan<--- Me!

and our Guests…

Pamela Young

Emily Leiphart

Julie Day

Candice Fields

Have a great day!!!

Monday, January 23, 2012

Dreamweaver Stencil Winter CHA ♥Sneak Peek♥


It is that time of year again!!  The Winter Craft and Hobby Association Trade Show.  Everyone that loves crafting knows this is the time of year that each company releases their new product for 2012.

Today I have a sneak peek of two new Dreamweaver Stencils, Retro Sitting Cat (LL3020) and Waves and Dots (LX7012) background stencil.

Dreamweaver-Retro-Kitty

I had a great time using the two techniques I have done.  The background is a Faux Letterpress background.  I spritzed the background stencil with multiple colors of Memory Mist Inks, placed a piece of watercolor paper over the inked stencil, placed the rubber Stampin’ Details mat over the watercolor paper, and two acrylic mats and rolled through the die cutting machine.   Pull the paper off of the stencil.  Where your color was applied on the stencil, it will now have transferred to your watercolor paper.

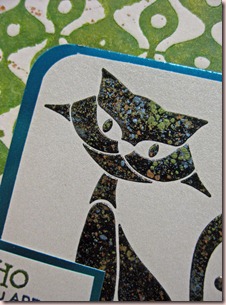
The second technique is the Metallic FX technique.  I pasted embossed the Retro Sitting Cat stencil with Glossy Black Embossing Paste.  While the paste is still wet, sprinkle Metallic FX Mica Powders over the wet paste with a stencil brush or Q-Tip.  Set aside and let dry.

Here is a close up look at the technique…

Upclose-Kitty

Members of the Dream Team are featuring new Stencils each day this week.  You can see a list of the Dream Team members to the right of this post.  Check out what these fabulous gals are up too with our  new designs!!

Saturday, January 21, 2012

Bling, Bling….Stampendous Saturday!!

Another Saturday means another chance to get your bling on with the fabulous ladies at Stampendous .  That's right, this month we are all about bringing in the New Year with some BLING!  Glitter, rhinestones, sparkly stickers...you name it.  Just make it shiny and get it on your project!


StampendousM&H2412(2)
 
I love the Stampendous Cling Imperial Jewel Stamp (CRR110).  It paired  up nicely with the sentiment from the prize for this month, Cherub Wishes!
 
I did a bit of Fran*taging around the edge of the card and on the sentiment panel, using Aged Gold Embossing Enamel and Gold Halo Glitter Mix.

Take a look at what these Stampendous team members have created to dazzle you today:


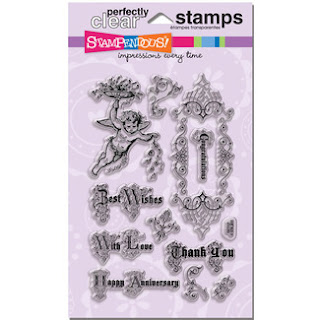
We want YOU to play along with us!  Just add you direct link to your card (make sure you've loaded it up with tons of BLING) to the linky tool below my signature (or on the Stampendous blog) no later than February 2, 2012 at 11:00 PM EST.  You don't have to use Stampendous products to play along, but we sure love it when you do!  And as an extra incentive for playing, one lucky person (drawn at random from all the entries) will receive this gorgeous Cherub Wishes Perfectly Clear Stamp Set:


Due to shipping restrictions, the winner must have a US address.  We hope you get a chance to play along with us!Happy Stamping!


Thursday, January 19, 2012

Dreamweaver Stencils Valentine’s Day Challenge!!

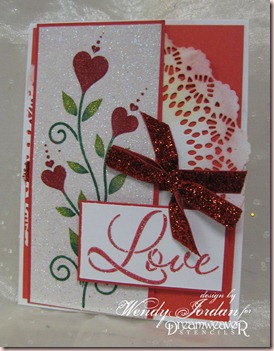
For the month of January, we challenge you to create something for Valentine's Day! You have until January 31st, 11:59 PM EST, to post and link your creation(s) to the Dream It Up! Blog Mr. Linky. The winners will be announced February 2nd, along with the February challenge. Here is my version of this month's challenge:
DreamweaverM&HClass2512

The Dangling Heart Stencil (LM272) is a Valentine favorite of mine.   It says love without saying anything at all.

I paste embossed the Dangling Heart with Glossy White Embossing paste and set it aside to dry.  While the paste was drying, I put a few drops of Sizzling Silver and Winter Red Color Solutions Alcohol Ink on my craft mat and swirled a square of Glossy cardstock through the ink.  The Color Solutions Ink dries quickly.  Once the image that was paste embossed was dry, I replaced the now, clean Dangling Heart stencil back over the top of the paste.  With a few more drops of Sizzling Silver and Winter Red ink on my craft mat, I picked up the color with my felt applicator and daubed color over the Glossy White Paste.  The image of my card doesn’t show the shimmer that the Dangling Heart now has.  In person, the image has the right amount of shine.  I love how the Glossy White Paste holds the ink and can change the color of the paste.

Need more inspiration? Please visit the rest of our fabulous team listed here:

Pam Hornschu
Laura Drahozal
Louise Healy
Wendy Jordan
Terrece Siddoway
Kristi Van Doren
Georgia Sommers
Lee Kellogg
Liz Martin
Cyndi Bundy
Cherylynn Moser
Jessie Hurley

We can’t wait to see what you can create with you stencils this month!!  Please link your creations to the Dream It Up Blog for your chance to win!!

Tuesday, January 17, 2012

Skipping Stones Designs Sketch Challenge #111

Welcome to Skipping Stones Designs Sketch Challenge!!

Pamela Young has provided a fabulous sketch this week…

SSD111

My interpretation is a bit different….but along the same lines…

SSD111

I used Skipping Stones Designs Featured Set of the Month, Grunge.

Check out the rest of the team to see what crafty creations they came up with ….

Jingle

JoAnn Valderama

Kandi Phillips

Karen Baker

Katie Gehring

Stephanie Mino

Shannon Teubner

Taylor Usry

Wendy Price

Wendy Jordan <--- ME!!

and our Guests…

Pamela Young

Julie Day

Emily Leiphart

Candace Fields

Skipping Stones Designs is having a PMS (Purchase More Stamps) Sale.  Here is how it works….

Buy 1 set and save 5% Enter PMS1 at checkout
Buy 2 sets and save 10% Enter PMS2 at checkout
Buy 3 sets and save 15% Enter PMS3 at checkout
Buy 4 sets and save 20% Enter PMS4 at checkout
Buy 5 sets and save 25% Enter PMS5 at checkout
Buy 6 sets OR MORE and SAVE 30% on every set you buy-no limit!!!
Enter PMS6 at checkout

Play along with this week’s sketch challenge and link up your creation to the SSD blog!!

Saturday, January 14, 2012

Stampendous Saturday **BLING** Challenge!! Week Two!!

Another Saturday means another chance to get your bling on with the fabulous ladies at Stampendous .  That's right, this month we are all about bringing in the New Year with some BLING!  Glitter, rhinestones, sparkly stickers...you name it.  Just make it shiny and get it on your project!


Stampendous-M&H-Class2412

I am in love with this card.  I know just the loved  that will be receiving this card!!

I stamped my focal image on card stock with black ink.  After, I stamped CRP149 Cling Chandelier stamp, I scored lines an inch apart,  with my scoring tool.  Where the score lines crossed each other, I place a dot of Liquid Pearls.

I punched two borders the same width of the card panel and adhered them to the back side of the panel.  I adhered the whole focal panel with dimensionals.

I simply stamped a sentiment and wrapped some ribbon around the card!!!  Fun and easy card!!!

Supplies:

Stamps: Cling Chandelier CRP149, Perfectly Clear Amore Frames SSC1128 (Stampendous)

Ink: Versafine Black Onyx (Tsukineko)

Border Punch: Martha Stewart

Extras: white organdy swirl ribbon (Creative Impressions); liquid pearls (Ranger Industies), Score Pal


Take a look at what these Stampendous team members have created to dazzle you today:


We want YOU to play along with us!  Just add you direct link to your card (make sure you've loaded it up with tons of BLING) to the linky tool below my signature (or on the Stampendous blog) no later than February 2, 2012 at 11:00 PM EST.  You don't have to use Stampendous products to play along, but we sure love it when you do!  And as an extra incentive for playing, one lucky person (drawn at random from all the entries) will receive this gorgeous Cherub Wishes Perfectly Clear Stamp Set:


Due to shipping restrictions, the winner must have a US address.  We hope you get a chance to play along with us!Happy Stamping!


Friday, January 13, 2012

I ♥ Stamps & Stencils!!!


Good morning!!

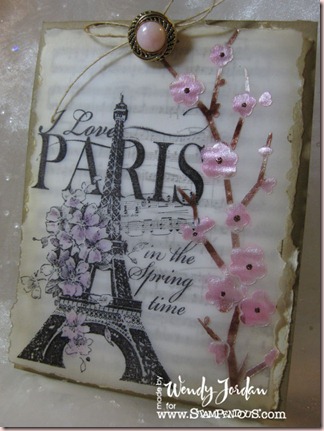
Yesterday in my Dreamweaver Stencils post, I had mentioned my  new found love for the Dreamweaver Plum Branch stencil.  Today I am here with a card that I created using my new favorite stencil and some Stampendous stamps!!

Stampendous-Dreamweaver1131

I started by stamping Stampendous Music Score (CRR103)stamp onto cream cardstock in brown ink.  I tore a slight edge around the Music Score. 

Using Memories Die Ink, I stamped the I Love Paris (CRP144) on vellum and heat set with my heat tool.  I like to use Memories Ink on vellum, because it dries nicely and the stamp doesn’t slip like other inks do on vellum.  I then layered my Plum Branch stencil (LL535) on the side of the focal image and paste embossed with Pearlescent Embossing Paste.  Once the paste was dry (about an hour), I masked off the Plum Branch stencil so I could airbrush color onto the embossed area were I wanted.  I continually moved the mask until the image was the color I wanted.

I added a bit of color onto the flowers on the focal image, but had to be careful, Memories Ink doesn’t play real nice with alcohol ink markers.

I torn a skinny edge around the vellum sheet and adhered to the front of the music score background with some twine.

I love how it turned out.   It was so fun to make a card, just because I wanted too!!

Thanks for taking a look today!!!

Supplies:

Stamps: I Love Paris CRP144, Music Score CRR103 (Stampendous)

Stencils: Plum Branch LL535 (Dreamweaver Stencils)

Paper: Cream & Kraft Cardstock, Vellum (Bazzill Basics Paper)

Ink: Versafine Vintage Sepia (Tsukineko); Memories Die Ink (Stewart Superior); RV42, RV04, E77 Sketch Markers (Copic)

Extras: Pearlescent Embossing Paste (Dreamweaver Stencils); Cinnamon Stickles (Ranger Industries); Twine (Creative Impressions), button (Craft Supply), Airbrush Compressor (Imagination International)

Thursday, January 12, 2012

A simple Valentine….

Good morning!!

Welcome to Week Two of our Dreamweaver Valentine Challenge!!

For the month of January, we challenge you to create something for Valentine's Day! You have until January 31st, 11:59 PM EST, to post and link your creation(s) to the Dream It Up! Blog Mr. Linky. The winners will be announced February 2nd, along with the February challenge. Here is my version of this month's challenge:

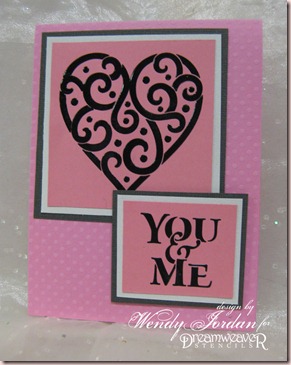
Clean & Simple card created with Glossy Black Embossing Paste

DreamweaverM&HClass2512(3)

Clean & Simple card created with Dry Embossing

DreamweaverM&HClass2512(2)

Both of the above cards were made with Heart Swirls (LL567) and You & Me (LS99).

The first card was paste embossed with Glossy Black Embossing Paste, and layered with coordinating cardstock.

The second card was made by layering stencil, paper, Stampin’ Details rubber mat and two acrylic plates on a die cutting machine platform and rolling it through the machine.  Layer focal images as desired.

These are a pretty and simple way to recreate easy Valentine’s.

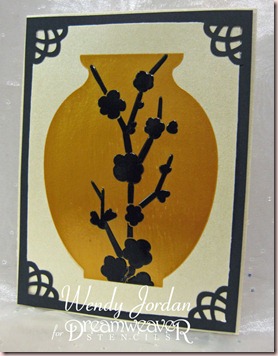
I made one more card this week that is just as Clean & (most importantly) Simple…

Dreamweaver11212

I have recently fallen in love with my Plum Branch (LL535) stencil.  This card was simply created by paste embossing Vase (LG615) stencil with Metallic Gold Embossing Paste.  Once that was dry, I replaced the Vase stencil over the dry paste and taped it down with Scotch Removable Tape.   I placed the Plum Branch stencil on the vase where desired and kept in place with removable tape as well.  I protected all of the areas that I didn’t want black paste with more tape.   I then paste embossed with Glossy Black Embossing Paste.  Once dry, I cut the card panel to the desired size and assembled card as desired.

Need more inspiration? Please visit the rest of our fabulous team listed here:

Pam Hornschu
Laura Drahozal
Louise Healy
Wendy Jordan
Terrece Siddoway
Kristi Van Doren
Georgia Sommers
Lee Kellogg
Liz Martin
Cyndi Bundy
Cherylynn Moser
Jessie Hurley
I am also entering these cards in a challenge blog that I recently found called Young Crafter Unite.  The challenge is Clean & Simple cards. 

Check it out!!!

Saturday, January 7, 2012

Stampendous Saturday **BLING** Challenge!!!

It's the very first Saturday of the month (wait - it's actually the first Saturday of the year!!), and that means the fabulous ladies at Stampendous have a brand new challenge to play along with. This month we are all about bringing in the New Year with some BLING! Glitter, rhinestones, sparkly stickers...you name it. Just make it shiny and get it on your project!

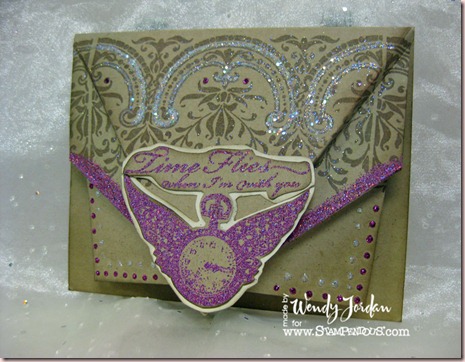
I had a great time this week playing along with our **BLING** challenge!! This card was created while preparing for a class that I am having in Blackfoot, Idaho, on February 3rd.
I used a new to me template called the “pleated front” card. I used a tutorial from the 3D and Fun Fold CD from Technique Junkies.
StampendousM&HClass(3)

Start by stamping the card base before the scoring. Stamp the GORGEOUS border from the Cling Jumbo Romantic Border set with Versafine Vintage Sepia ink. Score the card front and added a bit of Zig Glue Pen to highlight a few areas with my favorite Glitter, Silver Halo Glitter. Add a bit of Boss Gloss to the edge of the bottom fold and sprinkled Vintage Plum Embossing Tinsel.

On a separate piece of kraft cardstock stamp the Perfectly Clear Time Flies Set and emboss it with Vintage Plum Embossing Tinsel. Cut out the image and add a light colored cardstock underneath the image. Adhere it to the card front.

Embellish as desired.

Supplies:

Stamps: Perfectly Clear Time Flies Stamp Set, Cling Jumbo Romantic Border (Stampendous)

Paper: Kraft, Natural (Bazzill Basics)

Ink: Boss Gloss (Stampendous); VersaFine Vintage Sepia (Tsukineko)

Extras: Vintage Plum Embossing Tinsel (Stampendous); Silver Halo Glitter (Stampendous); Magenta, Stardust Stickles (Ranger)


Take a look at what these Stampendous team members have created to dazzle you today:


We want YOU to play along with us! Just add you direct link to your card (make sure you've loaded it up with tons of BLING) to the linky tool below (or on the Stampendous blog) no later than February 2, 2012 at 11:00 PM EST. You don't have to use Stampendous products to play along, but we sure love it when you do! And as an extra incentive for playing, one lucky person (drawn at random from all the entries) will receive this gorgeous Cherub Wishes Perfectly Clear Stamp Set:


Due to shipping restrictions, the winner must have a US address. We hope you get a chance to play along with us - happy stamping!

Thursday, January 5, 2012

Dreamweaver Valentine’s Day Challenge!!

Welcome to the first posting of the Dreamweaver Stencils' Dream Team 2012 ! We're changing things up a bit for this year, and YOU can help. The first Thursday of every month will feature our new challenge and will extend through the entire month. This means that YOU have ALL month to play along with the one challenge, as many times as you want. Sometimes it will be a color challenge, sometimes a theme, and sometimes a technique. We are hoping that an entire month will give you plenty of time to be inspired, create, and link to the Dream It Up! blog . Each month we are offering TWO prizes...one for the most creative version of the challenge (does not have to be Dreamweaver Stencils ' product, but we sure are happy when it is!), and the second for the best use of Dreamweaver Stencils ' product in the challenge. This could be stencils (of course), Embossing Pastes , Metallic F/X , the new Color Solutions , etc., anything you find on the Dreamweaver Stencils' web site , or in your local store. Don't know where your local store is? The list can be found on the web site . Not near any of the stores listed? There is also an online site to purchase from, Stencil with Style !
For the month of January, we challenge you to create something for Valentine's Day! You have until January 31st, 11:59 PM EST, to post and link your creation(s) to the Dream It Up! Blog Mr. Linky. The winners will be announced February 2nd, along with the February challenge. Here is my version of this month's challenge:

DreamweaverM&H2512(4)

This was FUN card. I soo love sparkly Valentines!!! The Heart Whimsy stencil is such a great Valentine and HAS to have glitter all over it!! Of course, the Double Glitter Technique!!!

I started by applying Hawaiian Coconut soap all over the back of my metal stencil. The soap aids in releasing the metal stencil from the adhesive mounting paper that it will stick too.

Once the soap is applied in a generous manner, remove one side of the Double Sided Mounting paper backing and place stencil on the adhesive paper, soap side down. Now it is time to start placing your colored glitter in the desired areas. Once your satisfied with your glitter coverage, use a Glitter Magnet or Swiffer Duster and remove any access glitter from the top of the stencil. Removing all of the excess glitter will keep the clean, crisp image. Turn your stencil, with the adhesive paper, upside down and peel your adhesive paper off of the stencil. Cover the rest of the exposed adhesive with a crystal glitter.

For the sentiment, paste emboss Love with red embossing paste. While the paste is still wet, sprinkle with a transparent glitter and let dry.

If you interested in a step by step tutorial on the Double Glitter Technique, please email me (wendyjo72@gmail.com) and I will send you’re a PDF.

Supplies:

Paper: Kisses, White (Bazzill Basics)

Stencils: Love & Joy, Heart Whimsy (Dreamweaver Stencils)

Die Cut: English Tea Party Doily Die (Cheery Lynn Designs)

Ribbon: Ruby Red Slipper (May Arts)

Extras: Red Glossy Embossing Paste (Dreamweaver); Multi-Crystal Glitter (Stampendous); Fire Red, Emerald Green, Grasshopper Micro Fine Glitter (Elizabeth Crafts)

Need more inspiration? Please visit the rest of our fabulous team listed here:

Pam Hornschu
Laura Drahozal
Louise Healy
Wendy Jordan
Terrece Siddoway
Kristi Van Doren
Georgia Sommers
Lee Kellogg
Liz Martin
Cyndi Bundy
Cherylynn Moser
Jessie Hurley
Tuesday, January 3, 2012

Skipping Stones Designs Sketch #109 Challenge!!

Happy New Year!!

It is soo good to be back in the land of blogging. 

I thought that I was taking a bit of a break, but now that I am back at it, I missed it a bit!!!

Today Skipping Stones Designs is welcoming a new Sketch Artist and three Guest Designers that will be joining us all month long.

Here is our first sketch of 2012 from Pamela Young

SSD109

My card…

SSD109

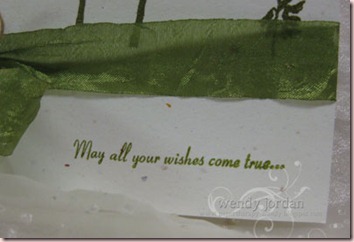
The sentiment is really small, here is a close up…

SSD109(2)

What a fun sketch!!  Thanks Pam!!

Check out how the rest of the team used this sketch…

Jingle

Joann Valderama

Karen Baker

Katie Gehring

Shannon Teubner

Stephanie Mino

Wendy Price

Taylor Usry

and our Guests…

Pamela Young

Emily Leiphart

Candice Fields

Julie Day

Now it is your turn!  We can’t wait to see what you can create with our sketch.  Link up your creation to the SSD blog for your chance to win a FREE SSD set!!!

Have a great day!