Dreamweaver Stencils January Challenge is Fresh Start and you can use this challenge to express what a Fresh Start is too you.
Last week, in my Fresh Start challenge post, I posted a card design, that is a true Fresh Start with stenciling. I dry embossed cardstock with a stencil and a die cut machine. In the post, I told you I was going to build on the challenge each week adding a new technique as the month progressed.
To read last week's post and see the Fresh Start creation, follow this link.
In last week's post, I showed how a simply embossed image can be so pretty. This week, I am starting with the simple embossed image and sharing two easy ways to add color.
 |

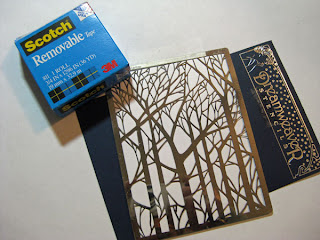
The supplies that I used to achieve the color's are Versafine Watermark Embossing Ink, Bare Trees (LJ849) Stencil, colored blending chalks.
I started by placing my clean, dry stencil over the top of the embossed image. I secured the stencil and paper on all four sides with Removable tape.
I added each color with my fingertip as the applicator. Be careful not to push to hard and your color will only stick where your Versamark Ink is.
The next design is the same stencil, same dry embossing technique, just a different color application (and a reason to get that Copic Air Brush Machine off the shelf).
Choose a few colors from your Copic or whichever marker you can use in your airbrush. The colors do not need to be in the same color family. I chose B32, B47, B99.
Apply a layer of your lightest color all over the image.
Jump to your darkest color and start at the bottom, where the sky would be darkest. Continuing to add lighter colors as you work to the top of your panel.
Remove your stencil and you will find this!! You can't see it in the picture, but this is where you will find that it is important your stencil is taped down on all four sides. This particular stencil, at my own fault, is slightly bent in the center and while airbrushing, a bit of blue got underneath the stencil. I still think the color gradient turned out stunning.
The Celebrate stencil was colored in the same way as the background.
I hope you enjoyed this easy way to add color to your embossed image.
Next week, I will continue my series with these two stencils and techniques associated with dry embossing.
Ready for more inspiration, please check out the rest of the Dream Team...
Cherylynn Moser
Cyndy Bundy
Georgia Sommers
Kristi Van Doren
Laura Drahozal
Lee Kellogg
Liz Martin
Lousie Healy
Lynell Harlow-Dream It Up
Pam Hornschu
Terrece Siddoway
Have a great DAY!!!
Supplies:
Stencils: Bare Trees (LJ849), Celebrate Script (LS90) Dreamweaver Stencils
Color Mediums: Copic Markers (Imagination International), Blending Chalk (Inkadinkado)
Ink: Versamark Watermark Ink (Tsukineko)
Extras: brads, ribbon (Creative Impressions)


5 comments:
both cards are so pretty. i don't have a copic air brush but now after seeing how you used it i think i will have to get one!! i really enjoy how the dream team show how to use the product - it makes it so much easier to try the different techs. thank you
Very nice Wendy!
These are both beautiful!
Great cards Wendy! Two easy ways to create a beautiful look!
Oh man, I just looked and no I don't have this stencil. You are the great enabler :) Thanks for your inspiration today. Both versions are stunning and thanks again for the great step-by-step instructions.
Post a Comment