If you arrived from the amazing stylings of
Terrece....you are in the right place!!
Now a bit about my projects....

Once all the embossing paste was dry (two hours total dry time), I placed the
Holly Swirl stencil back on the embossed images. Using a Jumbo Sponge dauber, I "daubed" Versamark all over the image and used
Kimono Red & Ivy Garden Metallic FX powder. I did the same technique with the
Christmas Script stencil. I used
Moonstone Metallic FX on the Christmas text.
Next....this was a fun one. I totally stepped out of my comfy card comfort zone!!

A fun Christmas ornament!! This is not a fib....I haven't made a handmade Christmas ornament since elementary school art class. All the years papercrafting, I have just stuck to what I though I was good at. As a matter of fact, this project started off as a card, BUT....I changed my mind. Here is how I did it....
I bought this amazing cardstock at a great scrapbooking store on Maui...it is perfect for Dreamweavers beautiful embossing pastes.
I started with green shimmery cardstock and embossed with
Round Doily (LG 655) and
Metallic Gold Embossing Pastes. I repeated the last step five more times on Scarlet Pearl Coredinations cardstock and let them dry (two hours). Once the paste was dry, using an xacto knife, I cut around the edge of each stencil.
I scored and folded each
Round Doily in half. Keeping all the doilies folded, I glued them all together.
At this time, the first green doily stencil was just hangin out waiting for me. I knew right away that this stencil needed it's new best friend, the Spellbinder Lotus Pendant die. In the center of the Lotus die, I embossed
Merry Christmas (LL386) on vellum and added a few small red rhinestones I attached these two cuties together and CHA CHING....my first Christmas ornament!
Alright....back to cards.....
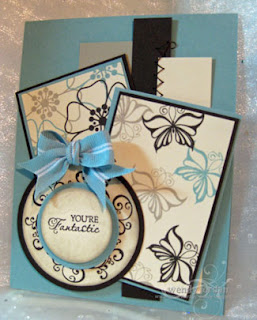
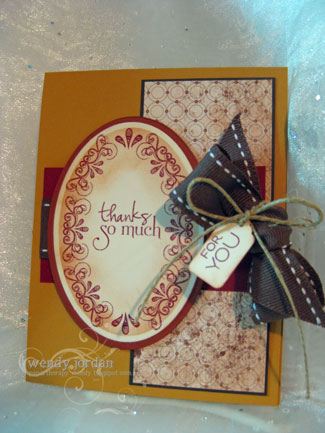
These next two cards are a first for me. I am one of those people that use stamps with stamps, dye ink with dye ink, alcohol ink with alcohol ink....You are getting the picture. I am way too organized. I don't mix and match and after making these next two cards....I am mad at myself for not using stencils with stamps, stamps with stencils... whatever... I realized that
Dreamweaver Stencils have a use in ALL crafting projects.
Here is what I did.....


I used some more of that awesome black shimmery cardstock and embossed the stencil with Pearle scent Paste...can you see how it make the paste look silver....it is just beautiful! On white cardstock, I embossed the Fan Pattern stencil with Glossy Black paste....you can kind of see how "glossy" the paste it.
Thanks for taking the time to look at all my
Dreamweavers Stencil projects....I had a blast making them!!!
Now for some deets on how we are going to get you some free Dreamweaver Stencil merchandise.....
BLOG HOP INFO
We want you to have the chance to win YOUR favorite stencil, embossing paste and Metallic F/X color... for each time you post along the hop, you need to leave a comment on the site where the newest creation is offered, then go to the Dreamweaver site here http://www.dreamweaverstencils.com/, choose the stencil you like best, identify it to us, tell us why it's your favorite, and how you think you'd use it. Just be sure you comment on each blog along the hop..make sure your comments count for winning! Information today...then October 1st you hop!
BLOG CANDY... HOW TO GET IT!
For each time you comment on different blogs, you need to choose a different stencil as a favorite, your favorite paste and your favorite Metallic F/X color...just in case you win more than once! At the end of the three days,each member of the Dream Team will choose a random entry to win and post it on their site by midnight of the next day October 4.
ANOTHER OPPORTUNITY FOR CANDY
Hoppers are encouraged to comment once on each designer's blog throughout the blog hop. Each time you do so will give you one opportunity to win what's on offer at that blog. For an additional entry, you're invited to sign up to be followers of the Dream it Up Blog, right here. So, with eleven designers, this gives you the potential of twenty-two chances to win! All winners will be selected by Random.org, and posted on each designer's blog by midnight Monday.
BLOG HOP SCHEDULE
It is not imperative to follow this schedule, but different designers will be posting their creations on different days, so take one last look on Sunday to make sure you've taken advantage for all the opportunities to win blog candy ...now enjoy these designer's "treats", and here is their schedule:
This is the last leg of the Dreamweaver Stencil blog hop....Head back to Dream It Up and leave your last comment!!! Thank you so much for taking part in the first ever Dreamweaver Stencil Blog hop.....You will be seeing more of us in the future!!~~~


