Thursday, September 13, 2012

Dreamweaver Stencils "Get Inky" September Challenge

Good morning!!
It's Dream Team Thursday already.  Thursday's are the one day of the week that the Dreamweaver Stencils Design Team post their challenge creations for the current month.  This month our challenge is to GET INKY, which is really easy for me!!!

I recently bought the entire set of Tim Holtz Distress Markers.  They sat there and sat there, until the other day I thought I should watch one of Tim's video's and use these guys.


One white cardstock, I laid down the Long Stocking Stencil (LL499) and adhered it temporarily with removable tape.  I drew around the outline of the stencil with a Sepia Copic Multiliner and started coloring with the markers.  I chose Peeled Paint, Pine Needles, Barn Door, Fired Brick, Antique Linen, Old Paper and of course the water brush.  I started coloring with my darkest color to my lightest color in each area and when over all the color with the fine tipped water pen.

As you can see, the panel with the focal image looks a bit "distressed".  This is wasn't intentional.  As I was embossing the background panel, my beautifully colored focal image got stuck to the bottom of my Big Shot and when the platform came out of the machine, so did my crinkled image, BUT I wanted this  to be a "distressed" card, I mean I am using Distress Markers after all.  I flattened the panel as best as I could, added Antique Linen Distress Ink to the edges and rolled with it.  I think it turned out great.

As I started to tell you in the previous paragraph, the background panel was dry embossed with the Holly Flourish (LG731) stencil.  I dry embossed the paper with the Big Shot.  Here is how I layered my  "sandwich" to achieve the dry embossing: Big Shot Multi Purpose Platform base (first two tabs removed), stencil, card stock (with a few spritzes of rubbing alcohol on the back), rubber embossing mat ( I used Stamping Details Rubber Mat from Dreamweaver Stencils) and two acrylic plates.  That is the recipe to perfect dry embossed stencil images every time.


Once the dry embossing was complete,  I placed the Holly Flourish stencil over the embossed image again and added color with a stenciling brush and VersaMagic Gingerbread and Hint of Pesto chalk inks.  The holly berries and tassels on the stocking are Fired Brick Distress Stickles.

I hope you enjoyed my little step by step.  I hope you have a chance to "Get Inky" this month with Dreamweaver Stencils.  Share your original creation with us at the Dream It Up blog.  You can link your projects there for your chance to win one of two prizes that Dreamweaver gives away to challenge participants each month.

Ready for more "INKY" inspiration?  Check out this group of talented ladies....


Have a great day!!!

Pin It

Tuesday, September 11, 2012

Stampendous Handmade Christmas

Good morning.
The team at Stampendous is loving the July 2012 Release of Christmas stamps, so we thought a great way for you to fall in love also would be a Blog Hop showcasing all of the Handmade goodness that can be made with these beauties.  You will find inspiration at each blog, something for every facet of crafting!!

If any of you have tried this tea from Barnes and Noble, you will understand why I have five or six of these empty tins in my craft room.   The tea is amazing, but so it the packaging.  I am glad that I finally am using this darling tin for a handmade gift!!!


I started with my item to alter (empty tea tin) and the Cling Jumbo Snow  set (CRS5042).
I trimmed a 12x12 piece of black cardstock to 3.5 x 12 (2), and a 10.5 x 5/8" piece of card stock.

I stamped the three snowflake images  in this set with Brilliance Starlite Silver pigment ink by Tsukineko,  on the 12 x 3.5 inch black cardstock and heat embossed with Winter Wonderland Embossing Powder (EP171).  I also stamped the beautiful shimmer dots and stars with Starlite Silver and heat embossed with Kaleidoscope Embossing Powder.  Photo's below.


I was just sent an amazing package of sticky goodness from Beacon Adhesives and I was given a product that I wasn't aware of, Fast Finish Decoupage.  I LOVE THIS PRODUCT.  It is as thin as water, and is applied with a bristle paint brush.  The finish goes on clear and stays clear.  Love that!!!


The glass bowl to the right is what I am using as my palette for the Fast Finish.  You can see it is clear.
The best part about Fast Finish is it adheres to ANYTHING and like the name indicates, it happens FAST.
I applied Fast Finish in small areas and adhered the cardstock down a small bit at a time, more for applying the embossed paper on straight then the Fast Finish drying quickly.


The completed project.  I applied Silver Crushed Glass Glitter, mixed with Silver Halo Glitter to double sided adhesive tape at the top of the tin and Recollections Bling on a Roll around the bottom and the top of the lid.


I applied Black, Steel Blue and Silver Crushed Glass Glitter to the top of the tin with Gem Tac from Beacon Adhesives.  Gem Tac is a permanent glue that you can embellish jeans, phones, purses, shoes, glasses and more.

This is view of the tin from the top.

I am going to fill this with MY favorite K Cups and give this to my Best Friend for Christmas.  We are both obsessed with finding delicious K Cups.  I am excited for her to get it.  


On the top of the tin is the two largest snowflakes of the set, heat embossed with Kaleidoscope Embossing Powder and cut out.  I placed them on top of each other and added a magnet on the back, so they can adhere to the tin or the refrigerator.

Thank you for stopping by today.  Please take a moment to see what my teammates made for  Hand Making from the Heart this week from Stampendous!

Be sure to leave comments on the teams posts each day this week for your chance to win prizes from Stampendous!!

Supplies Used:
Stamps: CRS5042 Cling Jumbo Snow (Stampendous)
Paper: Raven (Bazzill Basics Paper)
Essentials: Silver Halo Glitter;  Silver, Steel Blue and Black Crushed Glass Glitter (Stampendous)
Kaleidoscope and Winter Wonderland Embossing Powder (Stampendous)
Ink: Starlite Silver Brilliance Ink (Tsukineko)
Gems: Bling on a Roll (Recollections)
Extras: Fast Finish Decoupage, Gem Tac (Beacon Adhesives)


Pin It

Thursday, September 6, 2012

Dreamweaver Stencils September "Get Inky" Challenge


Good morning!

Today the Dreamweaver Stencils Dream Team is bringing you a new challenge for September, Get Inky.  I am super excited for this month,  Dreamweaver Stencils has plenty of options for "getting inky",  Color Solutions Alcohol Ink, Memory Mists, Pigment Ink pads.  

My card today brings together Color Solutions Inks, Memory Mist, Embossing Paste and Metallic FX.  

Making a background with Color Solutions Alcohol Ink is so fun, and I love that each turns out different.  I started by dropping three drops  of Thistle and Creme Brûlée Color Solutions Alcohol Inks on a craft mat.  I had previously cut a glossy sheet of cardstock down to 4.25 x 5.5.  I then placed the glossy side down onto the craft mat on top of the inks.  I the swirled the paper around until all glossy areas were covered.

The cool thing about Color Solutions Alcohol Ink is that your creation doesn't have to be done here.  I lifted my paper up to see what I had come up with.  It was a beautiful combination of lavender and light blue, but I wanted a bit more, so I added Sizzling Silver to the craft mat and a few drops of Color Solutions Alcohol Thinner and Cleaner to the craft mat.  Again, I laid the glossy side of the card stock down and swirled it around.  I created two different backgrounds, as you can see from the image.  I also had a large piece of each color of background left over for another project.


Alcohol Inks dry quickly so I was able to move on right away.  I paste embossed LG744, Rose Tree with Metallic Silver Embossing Paste.  Before the paste has a change to dry, I sprinkled Purple Satin Metallic FX over the paste, set it aside to dry.  I repeated all of the steps above for the Thank You Sentiment (LS1009).

The background base of my card was even easier than that to achieve.  I placed Daisy Background (LX7014) stencil over the card base and spritzed Iridescent Memory Mist over the top of the stencil and the card.  The background is gorgeous.  I hope you can see the amazing shimmer in the photo.  It really picks up the blue and lavender from the alcohol inked backgrounds.   

Psst....The Iridescent Memory Mist is, in my opinion, THE BEST ON THE MARKET.  It blows all the competition AWAY!!  A must have for you shimmer lovers out there.

Our challenge to you this month is "Get Inky" with your creativity and then you have to share with us.  Link up your original creation to the Dream It Up Blog!!!  

Follow along with the Dream Team today to see how they answered the challenge!!


We can't wait to see what you create!!
Have a great day!


Pin It

Tuesday, September 4, 2012

Paper Craft Planet 3D Challenge with Globe Craft Memories Piccolo Ornaments

Good morning, today it's me, Wendy Jordan showing you a fun new product line from an up and coming company in the Paper Crafting Industry, Globe Craft Memories. Globe Craft Memories introduced a fun new line at Summer 2012 CHA in Chicago, Piccolo Ornaments, which are laser cut book chipboard. Today I used a seasonal design, with some amazing products that I had in my stash.

 
 In each kit, you receive a laser cut design, two frames and two clear bubbles.


I wanted to create an enchanted globe scene with my silhouette of Santa, so I applied Modge Podge to one side of a clear bubble  and sprinkled a light coat of Stampendous Multi-Crystal Ultra Fine Glitter.  This glitter is transparent, in addition to the dry Modge Podge, so you can still see through the bubble when it is dry.


  Globe Craft Memories has a beautiful line of Embossing Enamels, so I chose a very glittery silver called Piccolo Embossing Enamel in Siam Silver.  This is a mix of fine embossing powder and a hint of glitter. Even though the Embossing Enamel selection from Globe Craft Memories is extensive, I didn't have a Royal Blue, so I chose Stampendous PearLustre Lapis Embossing Powder for my project and Stampendous Boss Gloss as my embossing ink.  The sponge dauber on this bottle is really handy for this particular project.


 I started by protecting my work surface with a piece of printer paper.  With my first frame flat on the table surface, I applied Boss Gloss generously to the one side.


I sprinkled Piccolo Siam Silver Embossing Enamel over the frame,


 and applied heat.  In this photo, you can see how the enamel is melting.  This is the first coat on this side.


I was going for a smooth surface so I applied two coats of  enamel to each side of the frame.  Once I heat embossed the first layer, I applied another coat of Boss Gloss, sprinkled an additional coat of enamel over the first and heated again. *It is important to remember, that when applying two coats of embossing enamel, you must wait for the first coat to completely cool, this will eliminate damage to the first layer. I repeated the above steps on the other side of the frame.


 I applied Stampendous PearLustre Lapis embossing powder to the cute Santa silhouette in the same manner.  A layer of Boss Gloss, a layer of embossing powder, heat and repeat the steps.  I love the "pearly" finish that the Stampendous PearLuster powders provide.


 All three pieces have been embossed and my ornament is ready to be adhered together.


 I applied a layer of Zip Dry to the edge of the bubble and simply laid the frame over the top.


Once the frame and bubble were adhered together, another layer of Zip Dry on the now frame with bubble and  layered it on top of the Santa silhouette. In the next image, you will see that I didn't want to hold the two pieces together with my hands until it dried, so I clipped it together with those cool clippy things that I have lying all over my craft studio.  Finally....a use for them.  Ha!


 Now the time has come to decided if I want to add something to be seen in the middle of the ornament.  This part is so cool, even though I added Stampendous Shaved Ice to my project, you could add ANYTHING you want to be seen inside of the ornament. Globe Craft Memories also offers a plain ornament, without a laser cut image.  How cute would a picture of your child or grandchild be inside of this ornament!!!!  Here is a link to the Traditional Oval Ornament.


 I sprinkled a few pinches of Stampendous Shaved Ice inside the frame to simulate snow at Santa's feet.


 With another layer of Zip Dry around the second frame and bubble, this is what the ornament looks like from the top, looking down.


 Ta-Da!!  The finished project.  I apologize for the picture.  I really struggle taking photo's of clear objects.  You can see the Stampendous Shaved Ice (snow) at his feet and in person, the glittery background makes this a beautiful shimmery ornament that will be beautiful on my Christmas tree in a few months. Globe Craft Memories has some really fun projects using different ornaments on their Piccolo Ornaments page.  Please take a look and be inspired by what they have to offer!!

 My challenge to you this week, is to make a Christmas Ornament, something 3D, seasonal and beautiful. Happy Paper Crafting!!!                

Pin It

Saturday, August 25, 2012


All of this week, the Dream Team and the Woodware UK teams are celebrating the release of the new holiday designs from Dreamweaver Stencils. Of course, no celebration is complete without prizes...and there are some fabulous ones for those commenting on both sides of the "pond". 

Each team will be providing the opportunity to win four prize packages of stencil designs, perfect for the holidays. Just leave your comments each day on each players' post as well as the Dream It Up! and Woodware UKblogs, and the Dreamweaver and Woodware Facebook pages. Two random commentors  will be chosen from the batch of weekday posts, one each from the DW and WW Facebook pages, and from the big hop on Saturday...from each side of the pond!* That's a total of eight prize packages up for grabs! Here's what you could win:


This card was created using new designs from Dreamweaver Stencils July CHA release.


                                                                                                                                                                         My project today is using Metallic FX, a pigment powder with many uses.

To begin my project, I paste embossed my Heart Ornaments stencil with Matte Black Embossing Paste and set aside to dry.  Once the image was dry (roughly 20 minutes), I placed my clean and dry Heart Ornament stencil on top of the dry paste.  I then layered the Christmas Border stencil over the heart ornaments with removable Scotch tape.  I applied Versamark Watermark Ink on the Christmas Borders stencil, so that the ink was only applied through the Christmas Border design.  With a 1/8 inch stenciling brush, I added Gold Dust Metallic FX to where  Versamark Ink was applied.  I repeated the same process for the second ornament.

Once I was satisfied with the ornament design, I removed the Christmas Borders stencil and added Versamark Watermark Ink to the rest of the Heart Ornament image, while the Heart Ornament stencil was still over the dried paste.   I added a Ivy Garden and Gold Dust Metallic FX to the pine boughs, and the branch.  I then removed my stencil.  To clean up the excess Metallic FX, I used a Glitter Magnet.

To highlight my ornaments on the black background, I used a gold glimmer pen around the edge of the hearts.

There is a pile of fun techniques that can be created using Metallic FX.  Please stay tuned for a video tutorial soon.  

To keep informed of all my You Tube videos, please subscribe to my channel, luvscards.  There are already a few video's for you to watch.

Don't forget to leave me some holiday cheer as you move on to the other players for today:


Remember to follow along with the challenges on the Dream It Up! andWoodware UK blogs for more prize opportunities, and more crafty inspiration, as well as "liking" DW and WW on Facebook.
*Winners selected must be from USA/Canada/UK only.


Pin It

Thursday, August 23, 2012

Dreamweaver Stencils & Woodware UK Christmas in July Blog Hop


All of this week, the Dream Team and the Woodware UK teams are celebrating the release of the new holiday designs from Dreamweaver Stencils. Of course, no celebration is complete without prizes...and there are some fabulous ones for those commenting on both sides of the "pond". 

Each team will be providing the opportunity to win four prize packages of stencil designs, perfect for the holidays. Just leave your comments each day on each players' post as well as the Dream It Up! and Woodware UKblogs, and the Dreamweaver and Woodware Facebook pages. Two random commentors  will be chosen from the batch of weekday posts, one each from the DW and WW Facebook pages, and from the big hop on Saturday...from each side of the pond!* That's a total of eight prize packages up for grabs! Here's what you could win:


I love Dreamweaver Stencils in conjunction with the Gold Leafing Technique.  The Gold Leafing gives such dramatic, beautiful effects. 

I created a step by step video tutorial to share how I created this card from start to finish.  I'd love it if you would take a look.


Supplies Used:

Paper:  Bazzill Basics
Card Dimensions: 5 x 7


Don't forget to leave me some holiday cheer as you move on to the other players for today:

Dream It Up! 
Woodware UK 
Cyndi Bundy
Louise Healy 
Laura Drahozal 
Lee Kellogg
Terrece Siddoway
Wendy Jordan 

Pam Hornschu
Liz Martin                                                  
 
Kristi Van Doren

Remember to follow along with the challenges on the Dream It Up! andWoodware UK blogs for more prize opportunities, and more crafty inspiration, as well as "liking" DW and WW on Facebook.
*Winners selected must be from USA/Canada/UK only.


Pin It

Tuesday, August 21, 2012

Skipping Stones Designs Sketch Challenge 142


Welcome to Skipping Stones Designs Sketch Challenge 142!!  We are digging into the Sketch Vault for sketches from some of our amazing Sketch Designers from the past.  

This week we have chosen to create with Amy Sheffer's sketch from 2011.

Today we are using Heartsong 2!  I love this set.  It has beautiful images and fonts.


I hope you will have time to play along with Skipping Stones Designs Sketch Challenge.


Link your creation to the Skipping Stones Designs blog for your chance to win a FREE SSD set!!!

Pin It


Monday, August 20, 2012

Dreamweaver Stencils Teams Up With Woodware UK


All of this week, the Dream Team and the Woodware UK teams are celebrating the release of the new holiday designs from Dreamweaver Stencils. Of course, no celebration is complete without prizes...and there are some fabulous ones for those commenting on both sides of the "pond". 

Each team will be providing the opportunity to win four prize packages of stencil designs, perfect for the holidays. Just leave your comments each day on each players' post as well as the Dream It Up! and Woodware UKblogs, and the Dreamweaver and Woodware Facebook pages. Two random commentors  will be chosen from the batch of weekday posts, one each from the DW and WW Facebook pages, and from the big hop on Saturday...from each side of the pond!* That's a total of eight prize packages up for grabs! Here's what you could win:


Today I chose to use a few of the new designs, Christmas Borders (LJ922) and Season of Joy (LX7016) from the new Holiday Dreamweaver Stencils collection.

I used a fun technique which some of you have seen on my blog time and time again, the Double Glitter Technique.  I also used a small bit of Paste Embossing.

Here it is....

A while back I created a video using the Double Glitter Technique.  You can access the video on You Tube.

This card was really fun to create.  I used multiple colors of Micro Fine Glitter Ritz by Be Creative. The sentiment was also created using the Double Glitter Technique.  One the left side of the car, I paste embossed a portion of the Christmas Borders stencil with Glossy Red Embossing Paste.


You can see that the sentiment on my card is part of the Season of Joy Stencil.  When I was done with my technique, I simply cut off the sentiment and added it in a lower area of the card.

Would you love to see some more FABULOUS Dreamweaver Stencil creations??? Check out all of these fabulous ladies...

Don't forget to leave me some holiday cheer as you move on to the other players for today:


Remember to follow along with the challenges on the Dream It Up! andWoodware UK blogs for more prize opportunities, and more crafty inspiration, as well as "liking" DW and WW on Facebook.

*Winners selected must be from USA/Canada/UK only.


Pin It

Saturday, August 18, 2012

Stampendous Wobbles, But We Won't Fall Down


It has been a great week for Stampendous and Action Wobbles.  We have been hopping all week and I hope you have inspired each and every day!!

I know I am about a week late for the Olympics, but I had to use this stamp and when I made this card, the Olympics were still happening.


I hope you will take my work that this stamp IS on an Action Wobbles.  Early this week, I posted a video of how I used Action Wobbles and Stampendous Stamps.  I'd hope you can take the time to take a peek.


Today card was made with Stampendous Cling London  and an Action Wobbles.  I colored the image with Copic Sketch Markers, cut the image out, added glitter the the word "London".

I had a great time this using Action Wobbles.

We're going to be giving away


6 Action Wobbles Springs


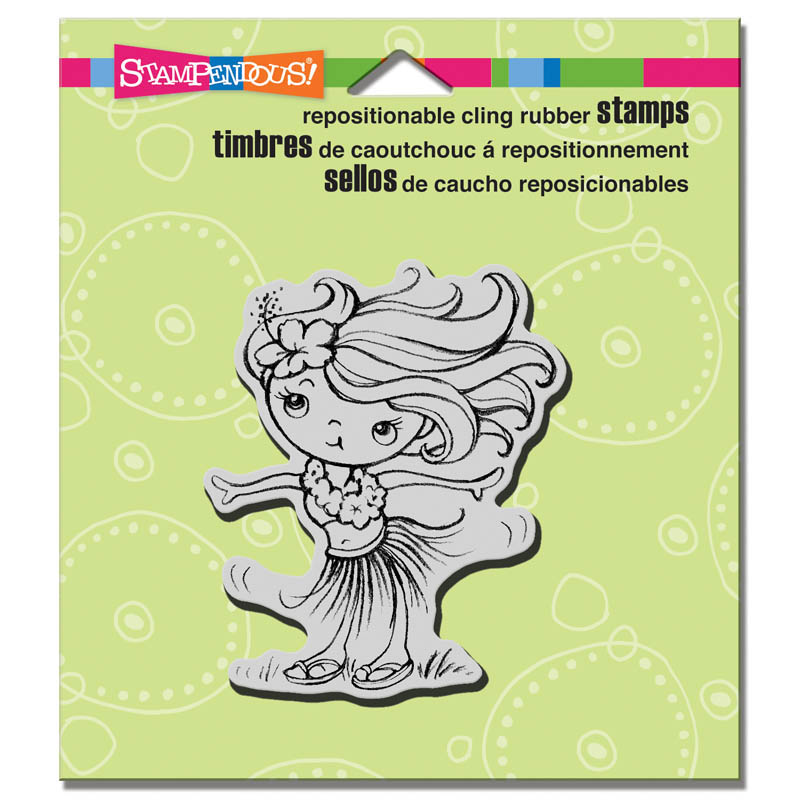
CRV265 Cling Hula Kiddo AND


6 Action Wobbles Springs


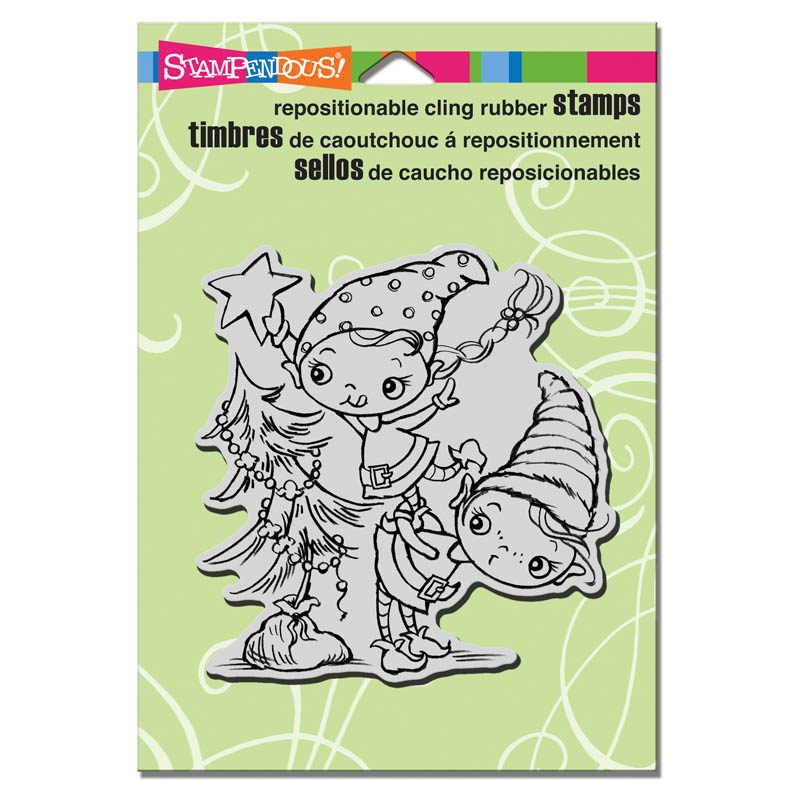
CRW076 Tree Trim Kiddos to a second lucky Blog Hopper!! (because we want to see that top Kiddo wobbling with that star!) How can you win? Comment on the blogs below! At the end of the weekend (yes, you have until Sunday night) we'll choose two of the blogs below at random. They will then choose a random winner and we'll notify you here! Here's who is playing today:


Missed the beginning of our week of wobbles??? Check them out here - MONDAY, TUESDAY, WEDNESDAY, THURSDAY, FRIDAY


Pin It